KzaApplicationProperties.onProjectLoaded callback implementation.
static const kzUint NUMBER_OF_WIDGETS = 14;
static const kzString WIDGET_NAMES[] = {"Browser", "Mail", "Game", "Time", "Calculator", "Camera",
	"Movie", "Calendar", "Chat", "Music player", "Ninja", "Splatter", "Superstar", "Chess"};
...
    kzUint i;
    /* Iterate through the list of widgets. */
    for (i = 0; i < NUMBER_OF_WIDGETS; i++)
    {
        struct KzuObjectNode* prefabInstance;

        /* Generate an instance of the prefab. */
        result = kzuPrefabTemplateInstantiate(applicationData->widgetItemPrefabTemplate,
			WIDGET_NAMES[i], &prefabInstance);
        kzsErrorForward(result);

        /* Add the prefab instance to the grid list box. */
        /* The list takes the ownership of the instance. */
        kzuUiListBoxAddObject(listBox, prefabInstance);
        ...
    }
kzuPrefabTemplateInstantiate and adding it to the grid list box. At application shutdown, Kanzi application framework automatically releases the scene node hierarchy and the memory reserved by the grid list box and its items.After adding the widgets to the scene, run the application to see a grid layout populated with the specified number of widget prefabs. The content of all prefab instances is the same: the default text and texture. The grid list box sets the interaction for the list, allowing horizontal scrolling of the list.
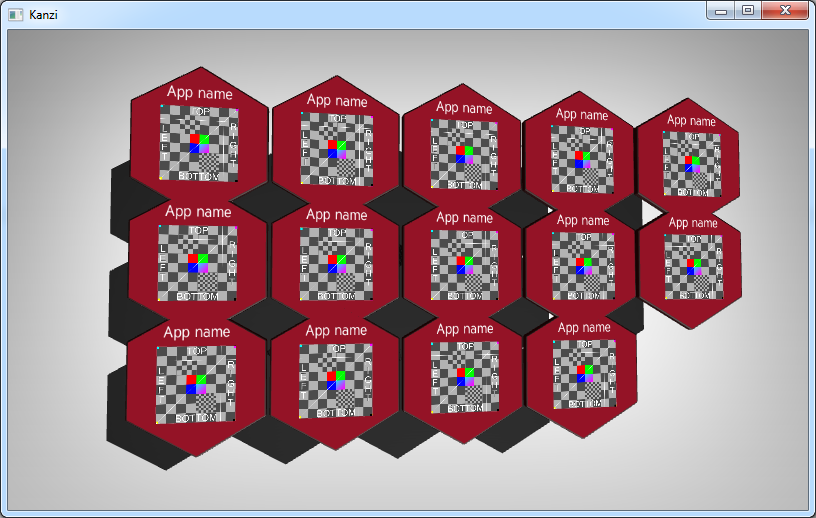
To ensure correct behavior you apply the transformation to the objects render transformation. Render transformation differs from the regular transformation in that it is applied to the object after its layout transformation.
    /* Apply a translation to all widgets that are in the second row. */
    {
        /* The index of the current item. */
        kzUint itemNumber = i + numberOfItemsInGridLayout;

        /* We know that the items are laid out into three rows. */
        kzUint row = itemNumber % 3;

        if (row == 1)
        {
            /* Define the translation. */
            struct KzcMatrix4x4 translate = KZC_MATRIX4X4_IDENTITY;
            kzcMatrix4x4Translate(&translate, 2.75f, 0.0f, 0.0f);

            /* Apply translation to object's render transform. */
            result = kzuObjectNodeSetRenderTransformation(prefabInstance,
				&translate);
            kzsErrorForward(result);
        }
    }
To update the string property of the prefab instance, fetch the right property type (WidgetName) from the property registry.
    /* Set the name for the widget. */
    {
        /* Get the custom property type that was created for storing the widget name. */
        struct KzuPropertyType* widgetNamePropertyType = kzuPropertyRegistryFindPropertyType("WidgetName");
        kzsAssert(kzcIsValidPointer(widgetNamePropertyType));

        result = kzuObjectNodeSetStringProperty(prefabInstance, widgetNamePropertyType, WIDGET_NAMES[i]);
        kzsErrorForward(result);
    }
static const kzString WIDGET_ICONS[] = {"Icon001.png", "Icon002.png", "Icon003.png",
"Icon004.png", "Icon005.png", "Icon006.png", "Icon007.png", "Icon008.png", "Icon009.png",
"Icon010.png", "Icon011.png", "Icon012.png", "Icon013.png", "Icon014.png", };
...
kzuResourceManagerRegisterProtocolHandler. Register a resource protocol named image with an image loader protocol handler.
/* Protocol to use for image textures loaded from the filesystem. */
static const kzString IMAGE_PROTOCOL = "image";
...
/* Resource manager protocol handler that is used with IMAGE_PROTOCOL and that loads an image */
/* identified by path from file system and creates a texture from it. */
KZ_CALLBACK static kzsError imageFileLoader(struct KzuResourceManager* resourceManager,
	kzString resourceURL, kzString protocol, kzString hostname, kzUint port,
	kzString path, void* userData, struct KzuResource** out_resource)
{
        kzsError result;
        struct KzcMemoryManager* memoryManager = kzcMemoryGetManager(resourceManager);
        struct KzcImage* image;
        struct KzuImageTexture* texture;

        /* Load image.(vertically flipped for OpenGL). */
        result = kzcImageLoadResourceFlipped(memoryManager, path, &image);
        kzsErrorForward(result);

        /* Create texture from image. */
        result = kzuImageTextureCreateFromImage(resourceManager, "Widget Texture",
			image, KZU_TEXTURE_FILTER_BILINEAR,
			KZU_TEXTURE_WRAP_REPEAT, 0.0f,
			&texture);
        kzsErrorForward(result);

        *out_resource = kzuImageTextureToResource(texture);
        kzsSuccess();
    }

    KZ_CALLBACK static kzsError startup(struct KzaApplication* application)
    {
        kzsError result;
        struct KzuResourceManager* resourceManager
                = kzuUIDomainGetResourceManager(kzaApplicationGetUIDomain(application));

        /* Register a protocol handler that the resource manager will use */
        /* for loading images from the file system. */
        result = kzuResourceManagerRegisterProtocolHandler(resourceManager,
			IMAGE_PROTOCOL, imageFileLoader, KZ_NULL);
        ...
    }
    ...
    KZ_CALLBACK void kzApplicationConfigure(const struct KzaSystemProperties* systemProperties,
		struct KzaApplicationProperties* configuration)
    {
    ...
        configuration->onStartup = startup;
    ...
    }
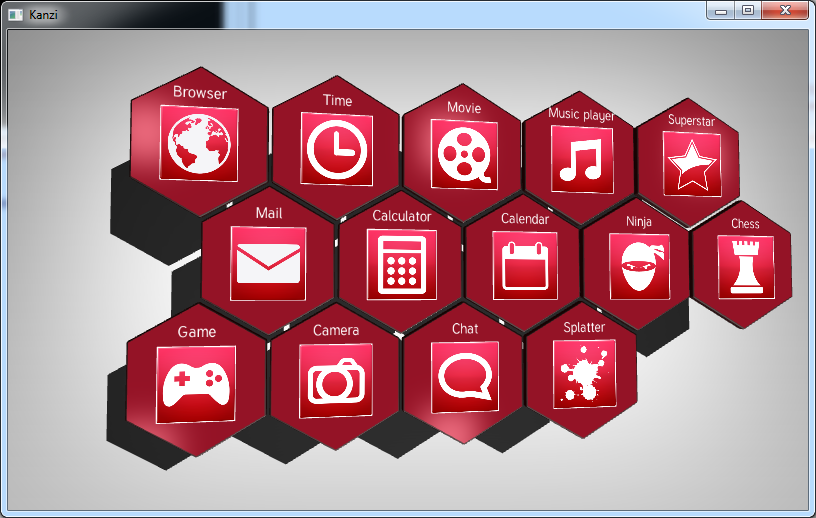
kzuObjectNodeAddResource. Use the registered image protocol handler to load the image resource to the texture identified by the resource ID. This is the full implementation in the KzaApplicationProperties.onProjectLoaded callback.
    /* Apply texture to icon. */
    {
        kzMutableString iconURL;

        result = kzcStringFormat(memoryManager, "%s:///%s", &iconURL,
                                IMAGE_PROTOCOL, WIDGET_ICONS[i]);
        kzsErrorForward(result);

        /* Change the IconTexture resource ID to point at the image on the file system. */
        /* The previously registered image protocol handler will be used for loading the resource. */
        result = kzuObjectNodeAddResource(prefabInstance, "IconTexture", iconURL);
        kzsErrorForward(result);

        result = kzcStringDelete(iconURL);
        kzsErrorForward(result);
    }
Define the array of placeholder widget descriptions.
static const kzString WIDGET_DESCRIPTIONS[] = {"Browser description", "Mail description",
	"Game description", "Time description", "Calculator description", "Camera description",
	"Movie description", "Calendar description", "Chat description", "Music player description",
	"Ninja description", "Splatter description", "Superstar description", "Chess description"};
KzaApplicationProperties.onProjectLoaded.
        /* Get the custom property type that was created for storing the widget description. */
        applicationData->widgetDescriptionPropertyType
                = kzuPropertyRegistryFindPropertyType("WidgetDescription");
        kzsAssert(kzcIsValidPointer(applicationData->widgetDescriptionPropertyType));

        kzuObjectNodeSetStringProperty(prefabInstance,
			applicationData->widgetDescriptionPropertyType, WIDGET_DESCRIPTIONS[i]);
With the prefabs instantiated and properly placed and the icons and widget names retrieved, the list of widgets is complete. In the next step you implement the interaction.